Handling Form Data With Reactjs Class Components – Using Event-handler, State


Table of contents


No headings in the article.
Hmmm, trust me it was an awesome, satisfying and challenging moment… LOL. Stay with me, I will walk you through the process.
Step 1: Create React App
I created my React App, navigated into the folder and launched my React Application using the steps below:
npx create-react-app form-handling(form-handling is the name of the folder)cd form-handlingnpm start
Step 2: Form Design
Just like in HTML, React uses forms to allow users to interact with the web page and input the required data.
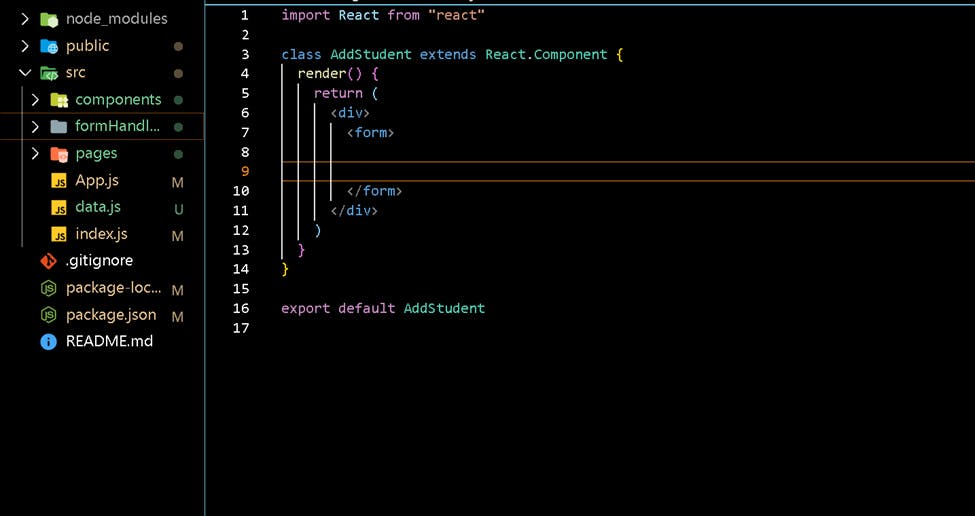
At this stage, I created a React Class Component and began designing my form using the different form element types.
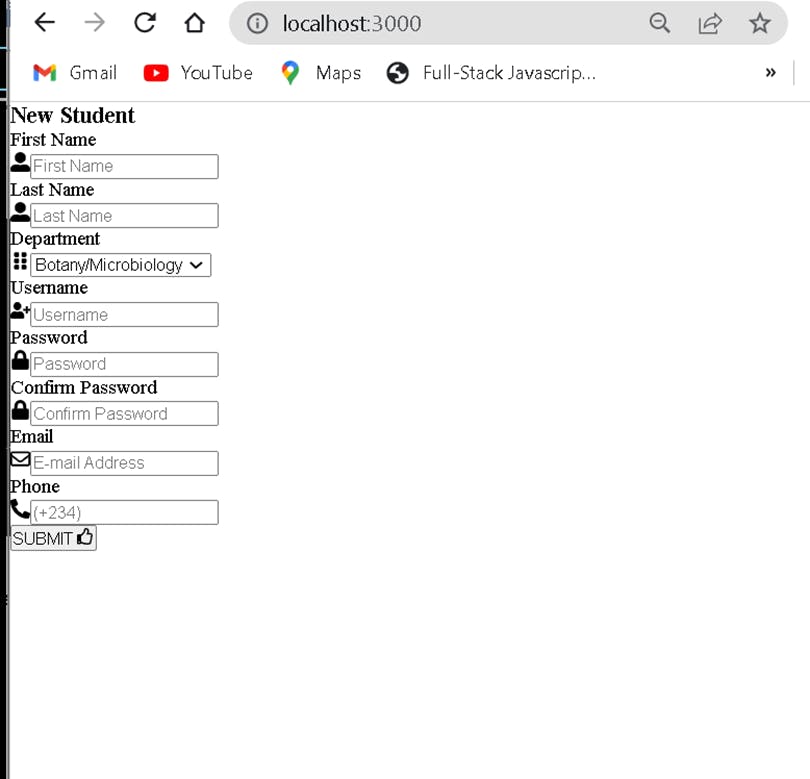
Yhh. After the design it was looking so good, I thought will be nice to add some icons. Then I proceed to the step below.
Step 3: Adding Icons and CSS
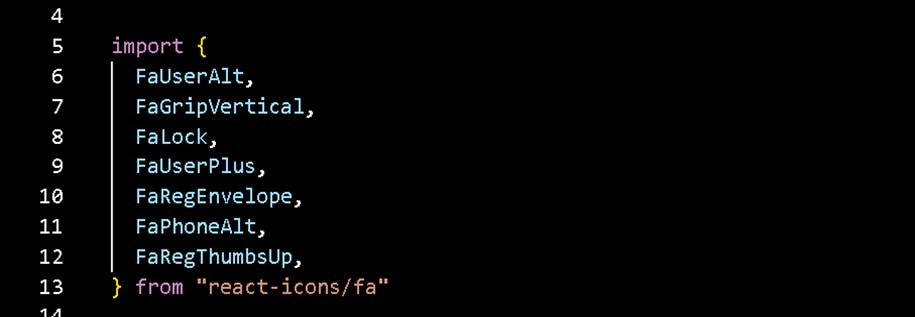
To add the icons on the page, I install React-icons to enable me access font-awesome icons
- React-icons is a small library that helps you add icons (from all different icon libraries) to your React apps.
To get started with React-icons, run the command npm install react-icons in your project folder
- Then go to the React/Font Awesome Icons page to import and use any desire icon.
e.g import { FaUserAlt} from "react-icons/fa";
render() {
`return (`

  `<div className="regContainer">`

    `<form onSubmit={this.handleSubmit}>`

      `<h3>New Student</h3>`

      `{/* FIRST NAME */}`

      `<div className="inputContainer">`

        `<label htmlFor="firstName">First Name</label>`

        `<div className="inputElement">`

          `<FaUserAlt className="icon" />`

          `<input`

            `type="text"`

            `id="firstName"`

            `name="firstName"`

            `placeholder="First Name"`

            `value={this.state.firstName}`

            `onChange={this.handleInput}`

          `/>`

        `</div>`

      `</div>`

      `{/* LAST NAME */}`

      `<div className="inputContainer">`

        `<label htmlFor="lastName">Last Name</label>`

        `<div className="inputElement">`

          `<FaUserAlt className="icon" />`

          `<input`

            `type="text"`

            `id="lastName"`

            `name="lastName"`

            `placeholder="Last Name"`

            `value={this.state.lastName}`

            `onChange={this.handleInput}`

          `/>`

        `</div>`

      `</div>`

      `{/* DEPARTMENT/OFFICE */}`

      `<div className="inputContainer">`

        `<label htmlFor="department">Department</label>`

        `<div className="inputElement">`

          `<FaGripVertical className="icon" />`

          `<select name="department" id="department">`

            `{`[`departments.map`](http://departments.map)`((course) => {`

              `return <option key={course}>{course}</option>`

            `})}`

          `</select>`

        `</div>`

      `</div>`

      `{/* USERNAME */}`

      `<div className="inputContainer">`

        `<label htmlFor="userName">Username</label>`

        `<div className="inputElement">`

          `<FaUserPlus className="icon" />`

          `<input`

            `type="text"`

            `id="userName"`

            `name="userName"`

            `placeholder="Username"`

            `value={this.state.userName}`

            `onChange={this.handleInput}`

          `/>`

        `</div>`

      `</div>`

      `{/* PASSWORD */}`

      `<div className="inputContainer">`

        `<label htmlFor="password">Password</label>`

        `<div className="inputElement">`

          `<FaLock className="icon" />`

          `<input type="password" id="password" name="password" placeholder="Password"`

            `value={this.state.password} onChange={this.handleInput}/>`

        `</div>`

      `</div>`

      `{/* CONFIRM PASSWORD */}`

      `<div className="inputContainer">`

        `<label htmlFor="confirmPassword">Confirm Password</label>`

        `<div className="inputElement">`

          `<FaLock className="icon" />`

          `<input`

            `type="password"`

            `id="confirmPassword"`

            `name="confirmPassword"`

            `placeholder="Confirm Password"`

            `value={this.state.confirmPassword}`

            `onChange={this.handleInput}`

          `/>`

        `</div>`

      `</div>`

      `{/* EMAIL */}`

      `<div className="inputContainer">`

        `<label htmlFor="email">Email</label>`

        `<div className="inputElement">`

          `<FaRegEnvelope className="icon" />`

          `<input`

            `type="email"`

            `id="email"`

            `name="email"`

            `placeholder="E-mail Address"`

            `value={this.state.email}`

            `onChange={this.handleInput}`

          `/>`

        `</div>`

      `</div>`

      `{/* PHONE NUMBER */}`

      `<div className="inputContainer">`

        `<label htmlFor="phone">Phone</label>`

        `<div className="inputElement">`

          `<FaPhoneAlt className="icon" />`

        `<input`

            `type="text"`

            `id="phone"`

            `name="phone"`

            `placeholder="(+234)"`

            `value={this.state.phone}`

            `onChange={this.handleInput}`

          `/>`

        `</div>`

      `</div>`

      `<button>`

        `SUBMIT <FaRegThumbsUp className="icon" />`

      `</button>`

    `</form>`

  `</div>`
Hmmm… after adding the icons, it still didn’t look nice either. This is what I got
Adding CSS:
.regContainer {
background-color: #1a120b;
display: flex;
flex-direction: column;
justify-content: center;
align-items: center;
padding: 80px 0px;
}
form {
width: 50%;
padding: 30px;
background-color: #e5e5cb;
border-radius: 10px;
}
.inputContainer {
margin: 20px 0px;
}
.inputContainer input,
.inputContainer select {
width: 90%;
margin-left: 10px;
padding: 10px;
font-size: 17px;
border: none;
border-radius: 8px;
}
label {
font-size: 20px;
text-transform: uppercase;
}
.inputElement {
background-color: #d5cea3;
border: 1px solid #ccc;
display: flex;
justify-content: space-between;
align-items: center;
border-radius: 8px;
}
.icon {
margin-left: 10px;
font-size: 20px;
}
button {
width: 100%;
padding: 8px;
border-radius: 8px;
background-color: #3c2a21;
font-size: 22px;
border: 0.5px solid;
color: white;
}
I took a step further and added some Styles, waooo behold I was able to add some beauri to the page as shown below.
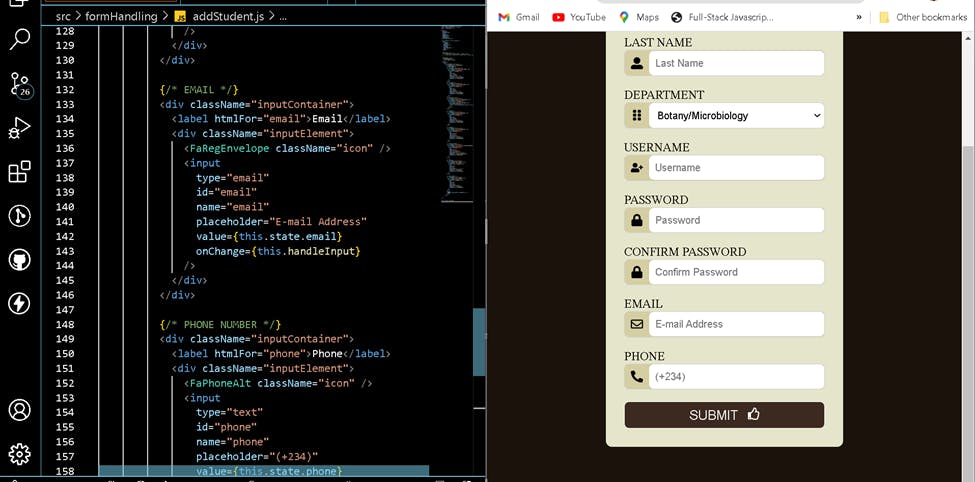
Step 4: Handling the Inputted Data
Welcome to the coolest stage, where live was given to the form using React Class State and event handlers. After the design, we need to put some brains into the form.
I declare an Object State
state = {firstName: "",lastName: "",department: "",userName: "",password: "",confirmPassword: "",email: "",phone: "",}Then added an onChange event handler to all the input elements:
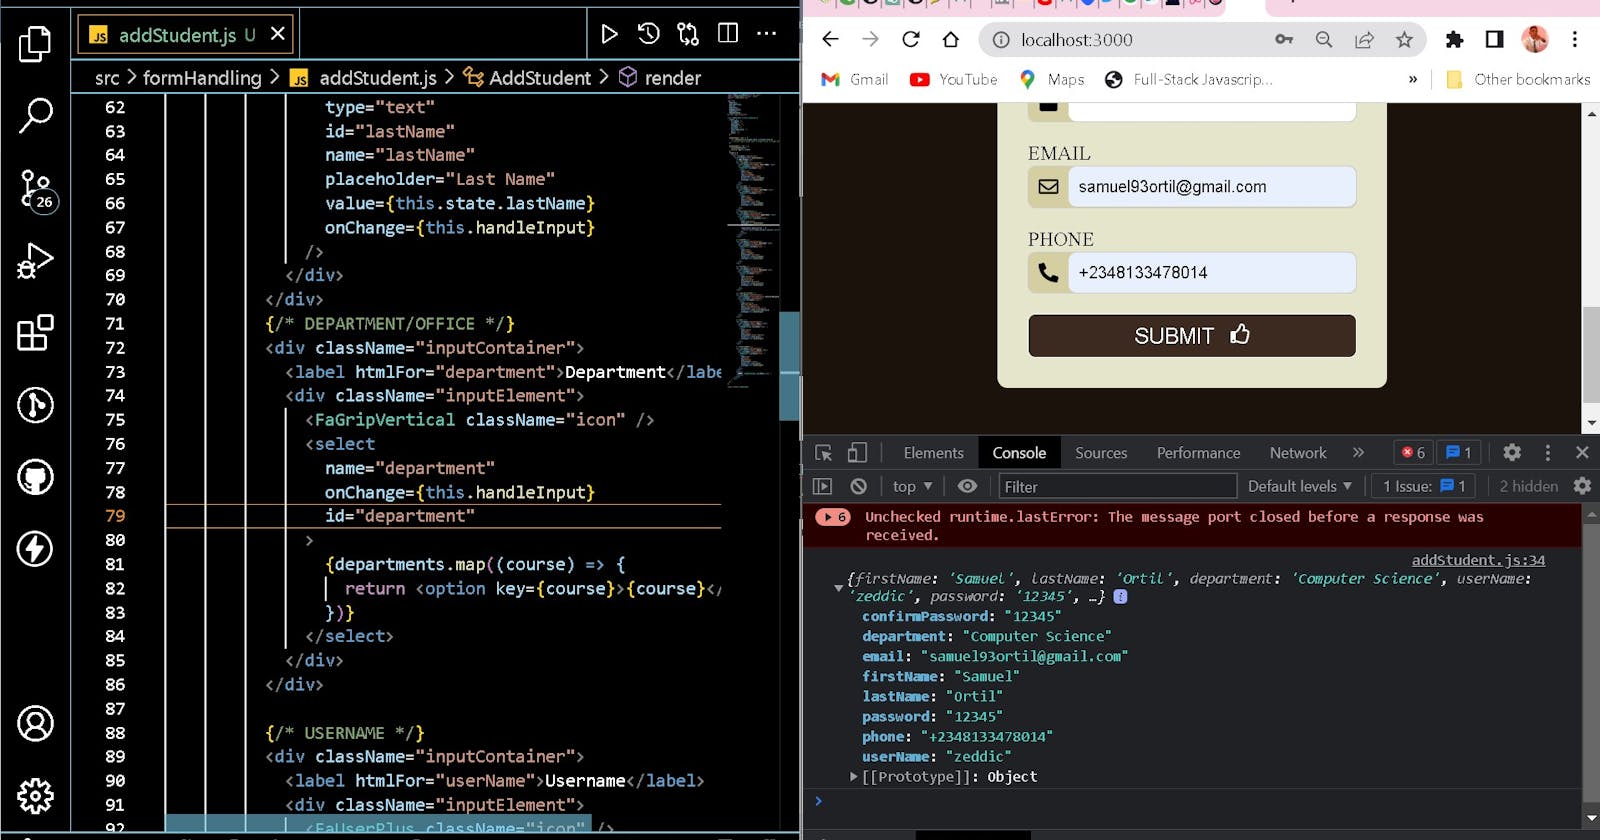
handleInput = (e) => {`this.setState({ [`[`e.target.name`](http://e.target.name)`]:` [`e.target`](http://e.target)`.value })` `// console.log(`[`e.target.name`](http://e.target.name)`,` [`e.target`](http://e.target)`.value,` [`e.target`](http://e.target)`.type)` `}`
With this event handler I was able to change the Object State by assigning the user input along the name of the input tag.
***Voila… I now have the inputted data binded.***
